Remote Support Instructions for Mac
Please follow the below prompts to connect a Warringah IT technician to your Mac for remote support:
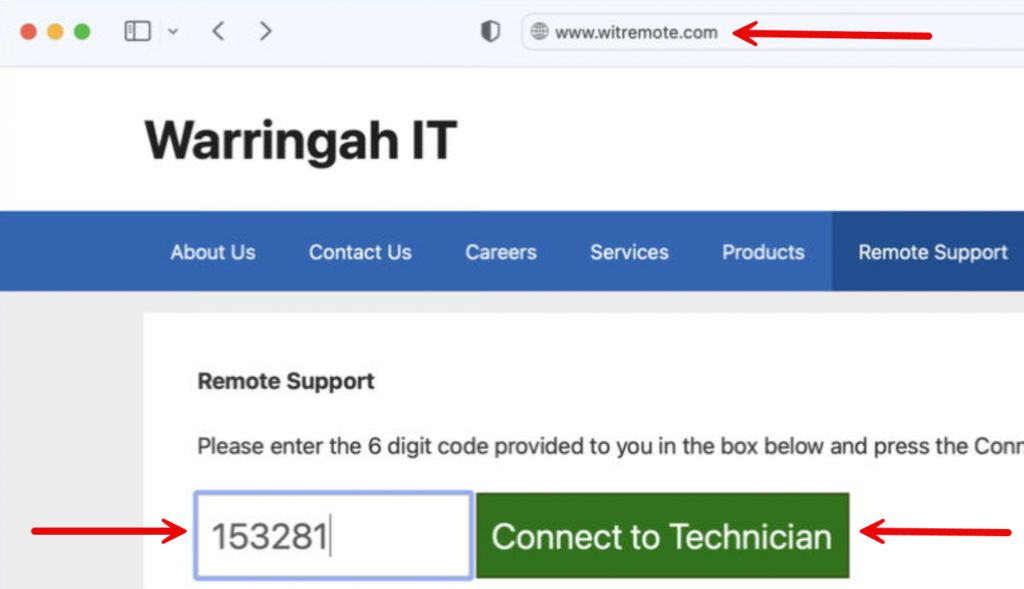
1. Go to https://witremote.com/
And enter the code we give you in the box that comes up, example below
Click ‘Connect to Technician’
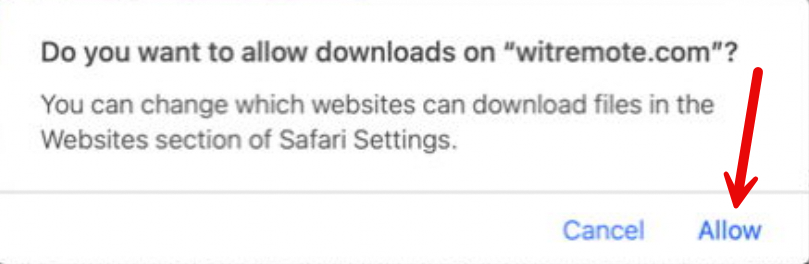
2.
Click allow downloads from witremote.com if prompted
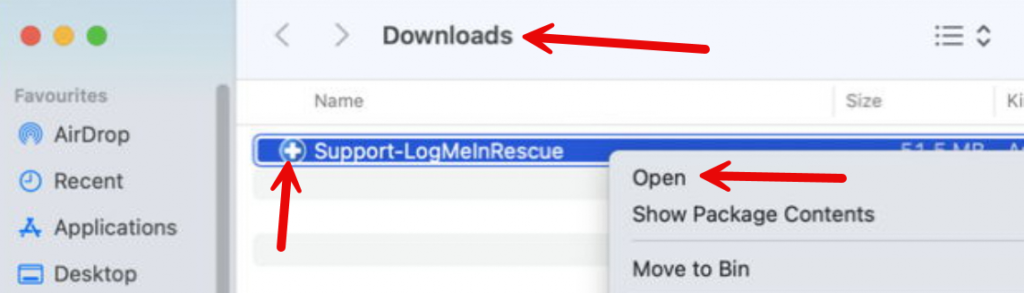
3. Go to your downloads folder
Find the Support-LogMeInRescue file
Right click, then ‘Open’
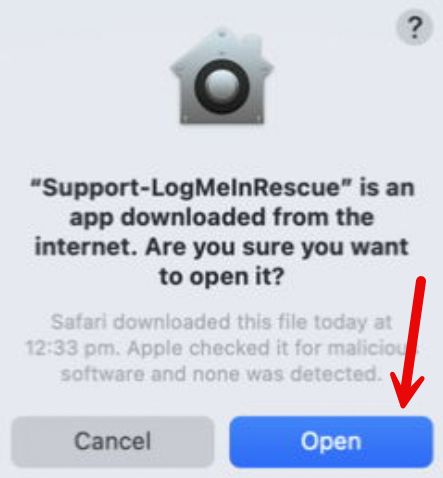
4.
Click ‘Open’ if prompted
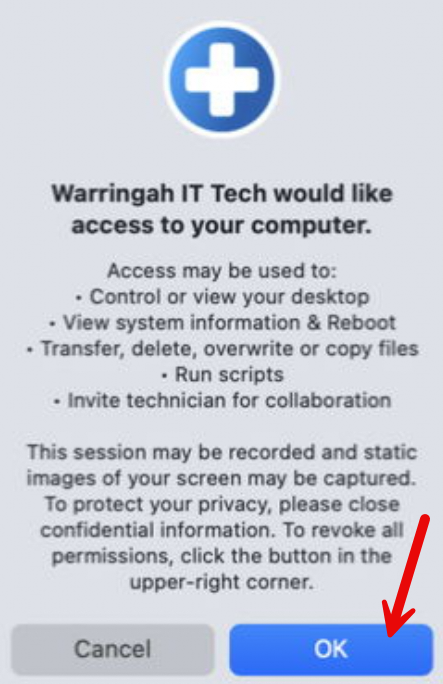
5. Wait for the technician to connected
Press ‘OK’ on this window
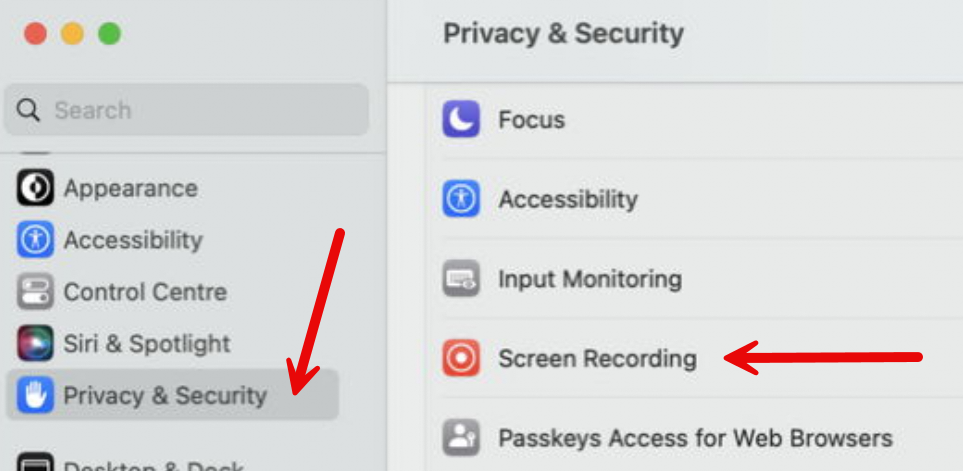
6. Give permissions to the Warringah IT support app, allowing it to access your Mac
Go to the ‘Settings’ app
Find the ‘Privacy & Security’ tab on the left side of the window
Scroll down until you find the ‘Screen Recording’ field on the right hand side, then click it
7. Click the button next to Support-LogMeInRescue, so it is enabled
Enter your password if prompted
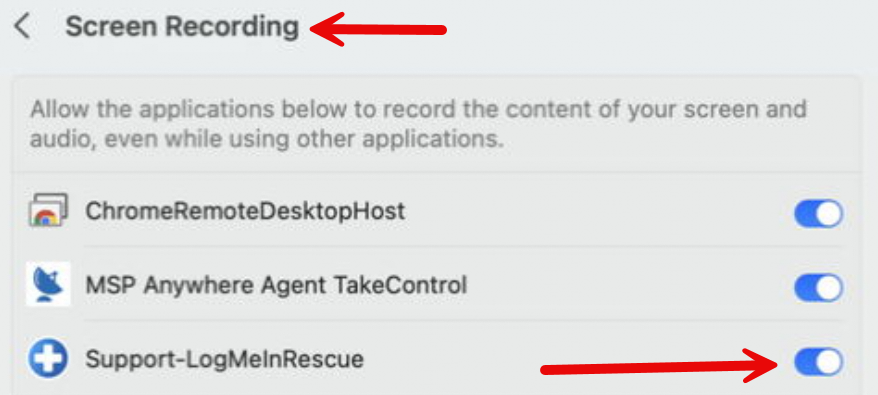
8. Click ‘Quit & Reopen’ on the next window

9. Go back (click the arrow in the top left)
Find the ‘Accessibility’ field
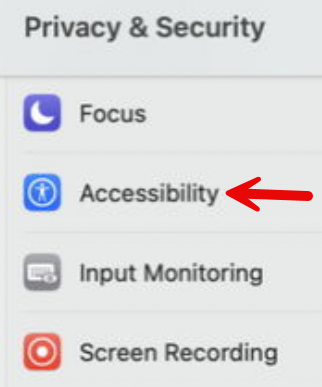
10. Again, enable the button for Support-LogMeInRescue

11. Tell the technician that you’ve enabled the permissions
They will now connect to your Mac and be able to remote on to assist you